Konnected is a product that can convert your wired home security system to a self-monitored smart home security system. It was successfully launched on Kickstarter and is now available for purchase.
Konnected’s Kickstarter success is not surprising as prior to launch the only way to takeover” an existing wired alarm system was to set up service through a traditional home alarm company. Konnected works without fees and even adds in the ability to connect your wired sensors to wireless sensors via rule-based automation.
Can Konnected Convert My (ADT, Vivint, Wired) Alarm?
We can’t discuss compatibility with every alarm that’s currently installed throughout the country, but according to Konnected, their system works with “common wired security system panels such as Honeywell, Ademco, DSC, Brinx, and all other hardwired systems.”1 If you have a wired alarm system, chances are that it will work with Konnected.
We have an old wired system that the builder installed when he built our home in 2012. We’ve never used it. It’s never been activated by the company that installed it or by any other company. We also know very little about it. However, our knowledge of the system was not as important as determining how many zones it system supports.
Buying the Right Kit
The easiest way to determine how many zones your system supports is to look at your old alarm panel. Sometimes you’ll find zone information written inside the panel. The second best option is to check the door to your wiring panel as sometimes a diagram will be included here. You can use this information to not only count zones but identify them. If not, you can count the wires which are usually bundled together in a closet, laundry room, garage, or under the stairs. If all else fails, you can count the number of wired sensors that you have.
Konnected sells four different zone kits: 6 zones for $89.00, 12 zones for $139.00, 18 zones for $179.00, and 24 zones for $219.00. If you underbuy, no worries; the kits are expandable. If you need to grow your set up over time, you can do this by adding more modules. That said, we went with the 6 zone kit as Konnected kindly provided the kit for testing.
Buying the Right Hub and Other Requirements
While a Konnected kit is one requirement, a compatible smart home hub is another.
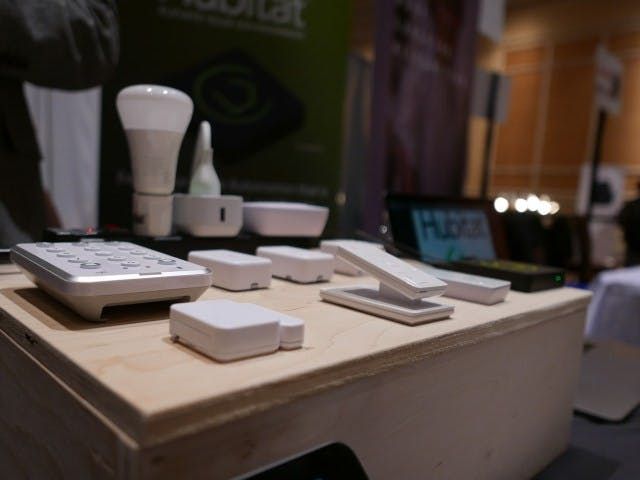
A smart home hub is required to provide the software that backs the Konnected hardware. In our opinion, using a third-party app is ideal as it allows you to integrate your wired sensors with your smart home and even allows you to expand by adding wireless sensors. Currently, Konnected is compatible with SmartThings, Home Assistant, Hubitat, and OpenHAB.
As a SmartThings user, we decided to go with SmartThings. Konnected works with both the V2 and V3 hubs as well as Samsung WiFi products. If you choose a SmartThings hub, there’s nothing else you need to buy.
If you choose Home Assistant or OpenHAB, you will need a Raspberry Pi 3 model B+ or something similar.
If you choose Hubitat, there’s nothing more you need to buy. For those who aren’t familiar, Hubitat is a cloud-less smart home hub.
One thing you don’t need is an existing alarm panel as everything is controlled using the app that is attached to the hub of your choice (SmartThings, Hubitat, etc.). Even after you’ve installed Konnected, your existing panel will be useless. If you must have a control panel, Konnected has outlined a DIY solution for replacing existing panels with tablets.2
The only other requirement is that you have a 2.4GHz network for Konnected to connect to.
What’s in the box?
In the box, you will find:
- Your Konnected Alarm
- A WiFi Module
- Piezo Buzzer With Jumper Wires (add for door chime)
- 12V Power Adapter
- Power Splitter Cable (12+ Zone Kits Only)
- A Window and Logo Sticker
- Wire Labels Sheet
- Adhesive Backed Mounting Standoffs
- Mini Screwdriver Pen
- Instructions
Installation
We were a little intimidated by the installation process. We procrastinated the project for an entire week. Installing Konnected is basically a motherboard replacement. You’re replacing your old motherboard with Konnected. While this isn’t that hard, we recently had a mishap with a motherboard replacement that left us with a broken tablet and an unresolved issue. Regardless, we persevered.
Tools and Connect to WiFi
While you don’t need tools to install Konnected, they suggest that you have a wire stripping and cutting tool (have), a wire toner/tracer and continuity tester (don’t have, didn’t buy), and a digital multimeter (don’t have, didn’t buy).
As far as step-by-step instructions, you won’t find those here as things change, boards change, and the best place to find instructions is going to be on Konnected’s own support site.3
What we will share here is our experience. We think the most important piece of advice we can give is to follow the directions. We're usually not glued to the instructions—we typically read them after the fact to make sure we don’t lead you all astray, but we certainly don’t read them for our benefit. When installing Konnected, we had to read every line.
The basic process is to connect the WiFi module to the Konnected board (easy) and then connect the board to WiFi (easy). If you have multiple boards, you will repeat these two steps for each board.
Connect Your Hub and Identifying Zones
Next, you’re going to connect Konnected to your hub of choice. Currently, connecting Konnected to SmartThings does require the use of a custom handler, but don’t be intimidated by this process. We decided to use the Github instructions because they were easier than the manual instructions. We simply followed along by watching this video.
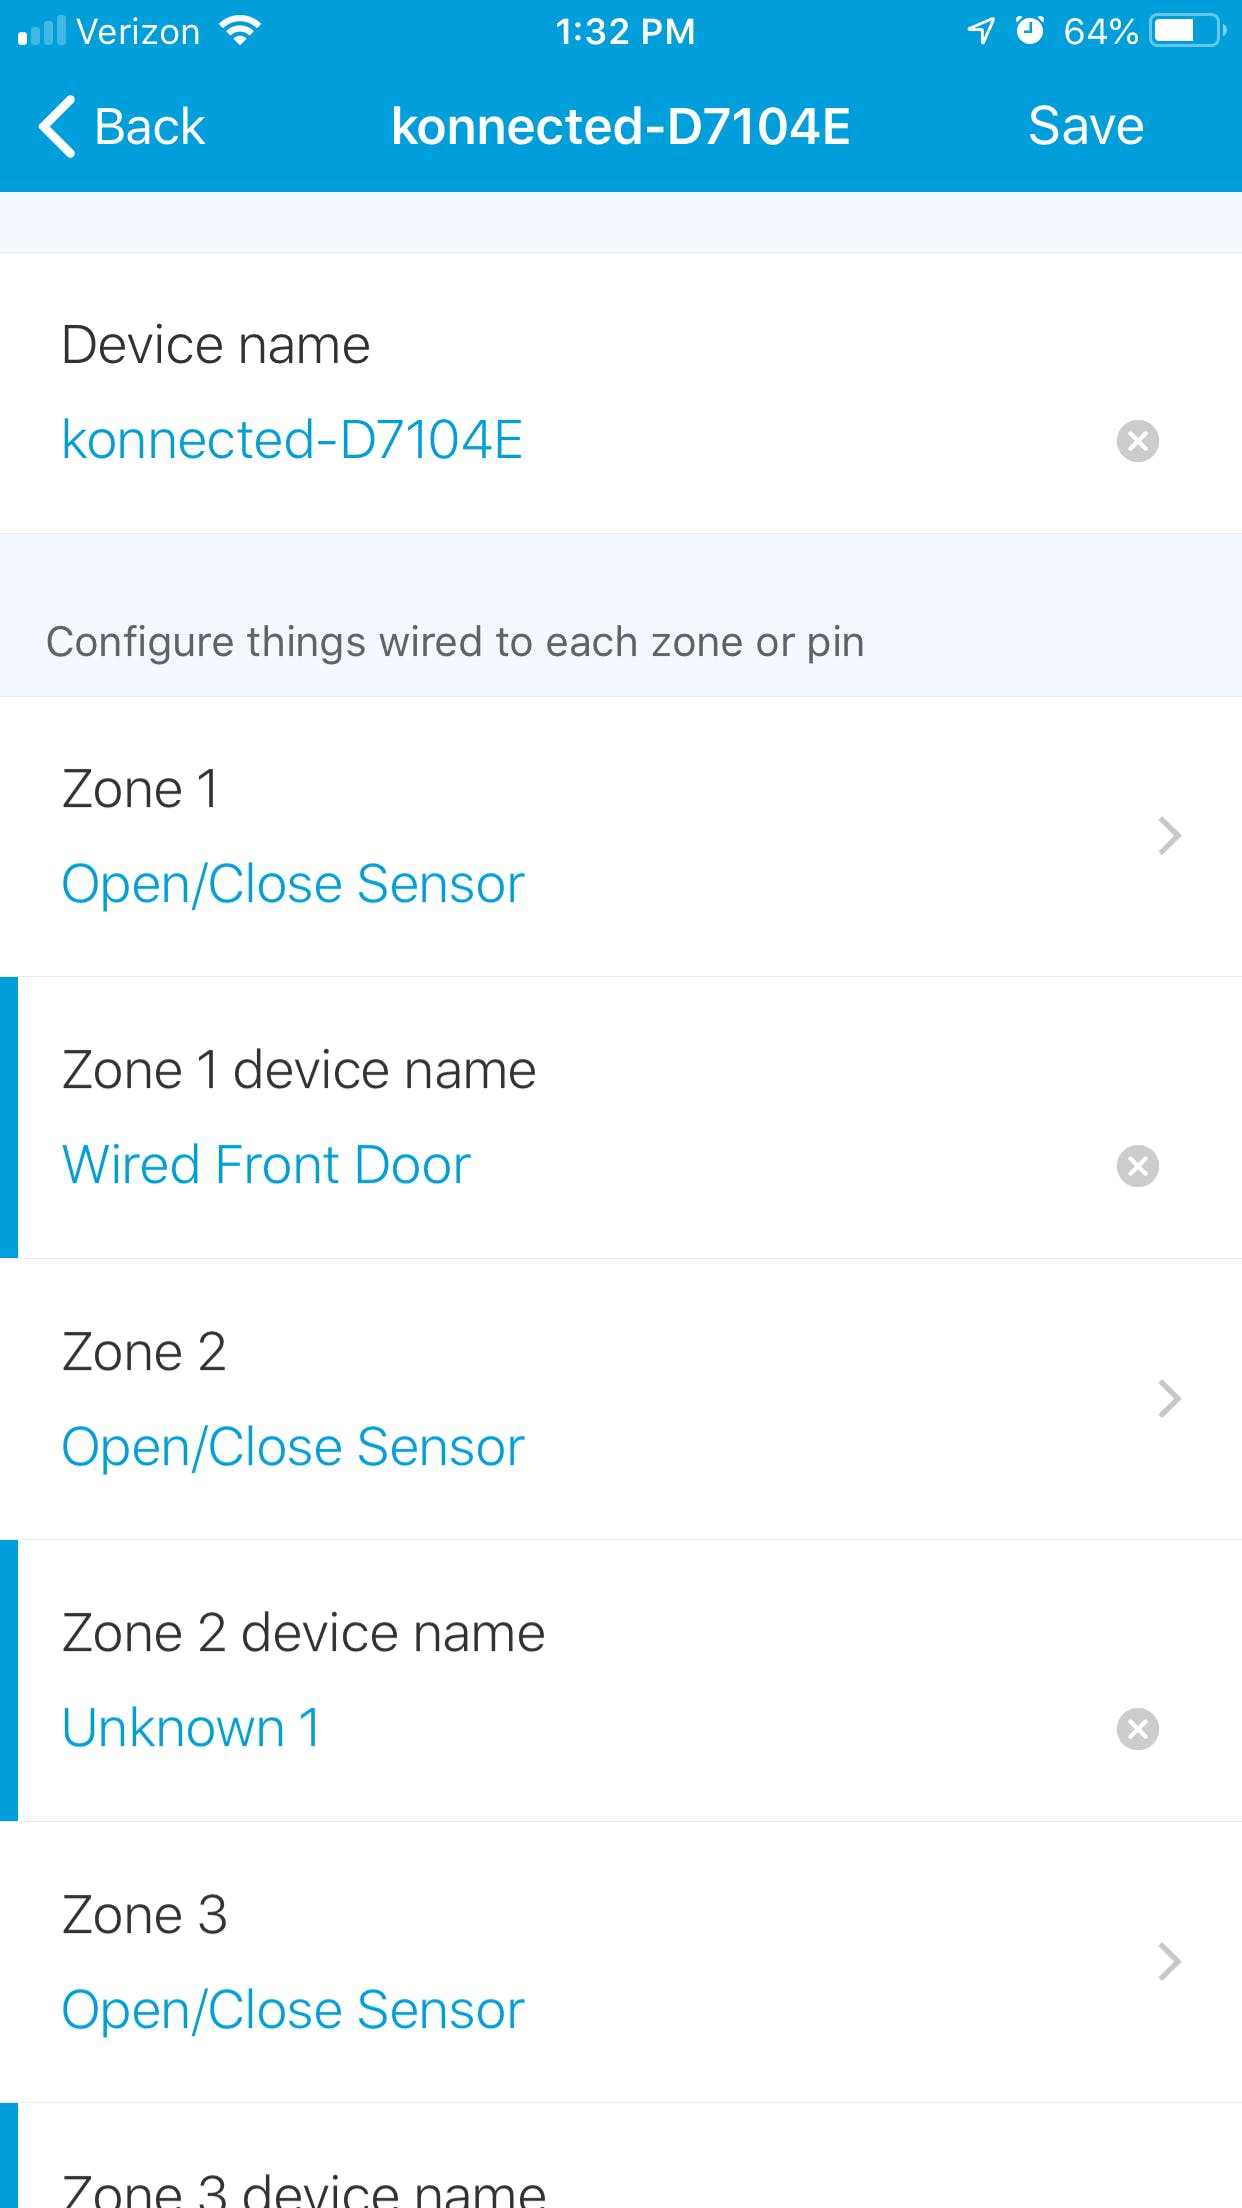
After you install the device handler, you will set things up using the SmartThings app. This is also explained in the video above. The good news is that all of the zones are preloaded. The bad news is that they are not automatically identified.
Our installation troubles began here. It’s incredibly easy to set up the zones within the SmartThings app if you know what zone corresponds to what type of sensor (door, motion, glass break, etc.), but we couldn’t find this information anywhere.
Instead, we tried to wire the Konnected panel (challenging) and then guess what was what. We started by labeling all of our zones as “contact sensors” and then went around the house opening and closing all doors and windows. Unfortunately, we were only able to discover two sensors this way though we're positive that we have three contact sensors.
We found out that the problem might be that the final sensor was never properly hooked up.
We removed the sensor by prying it out with a screwdriver, but it looked okay to me. The bottom line is that you might be able to use all of your wired sensors, you might not. Of the three contact sensors we found, only one works well.
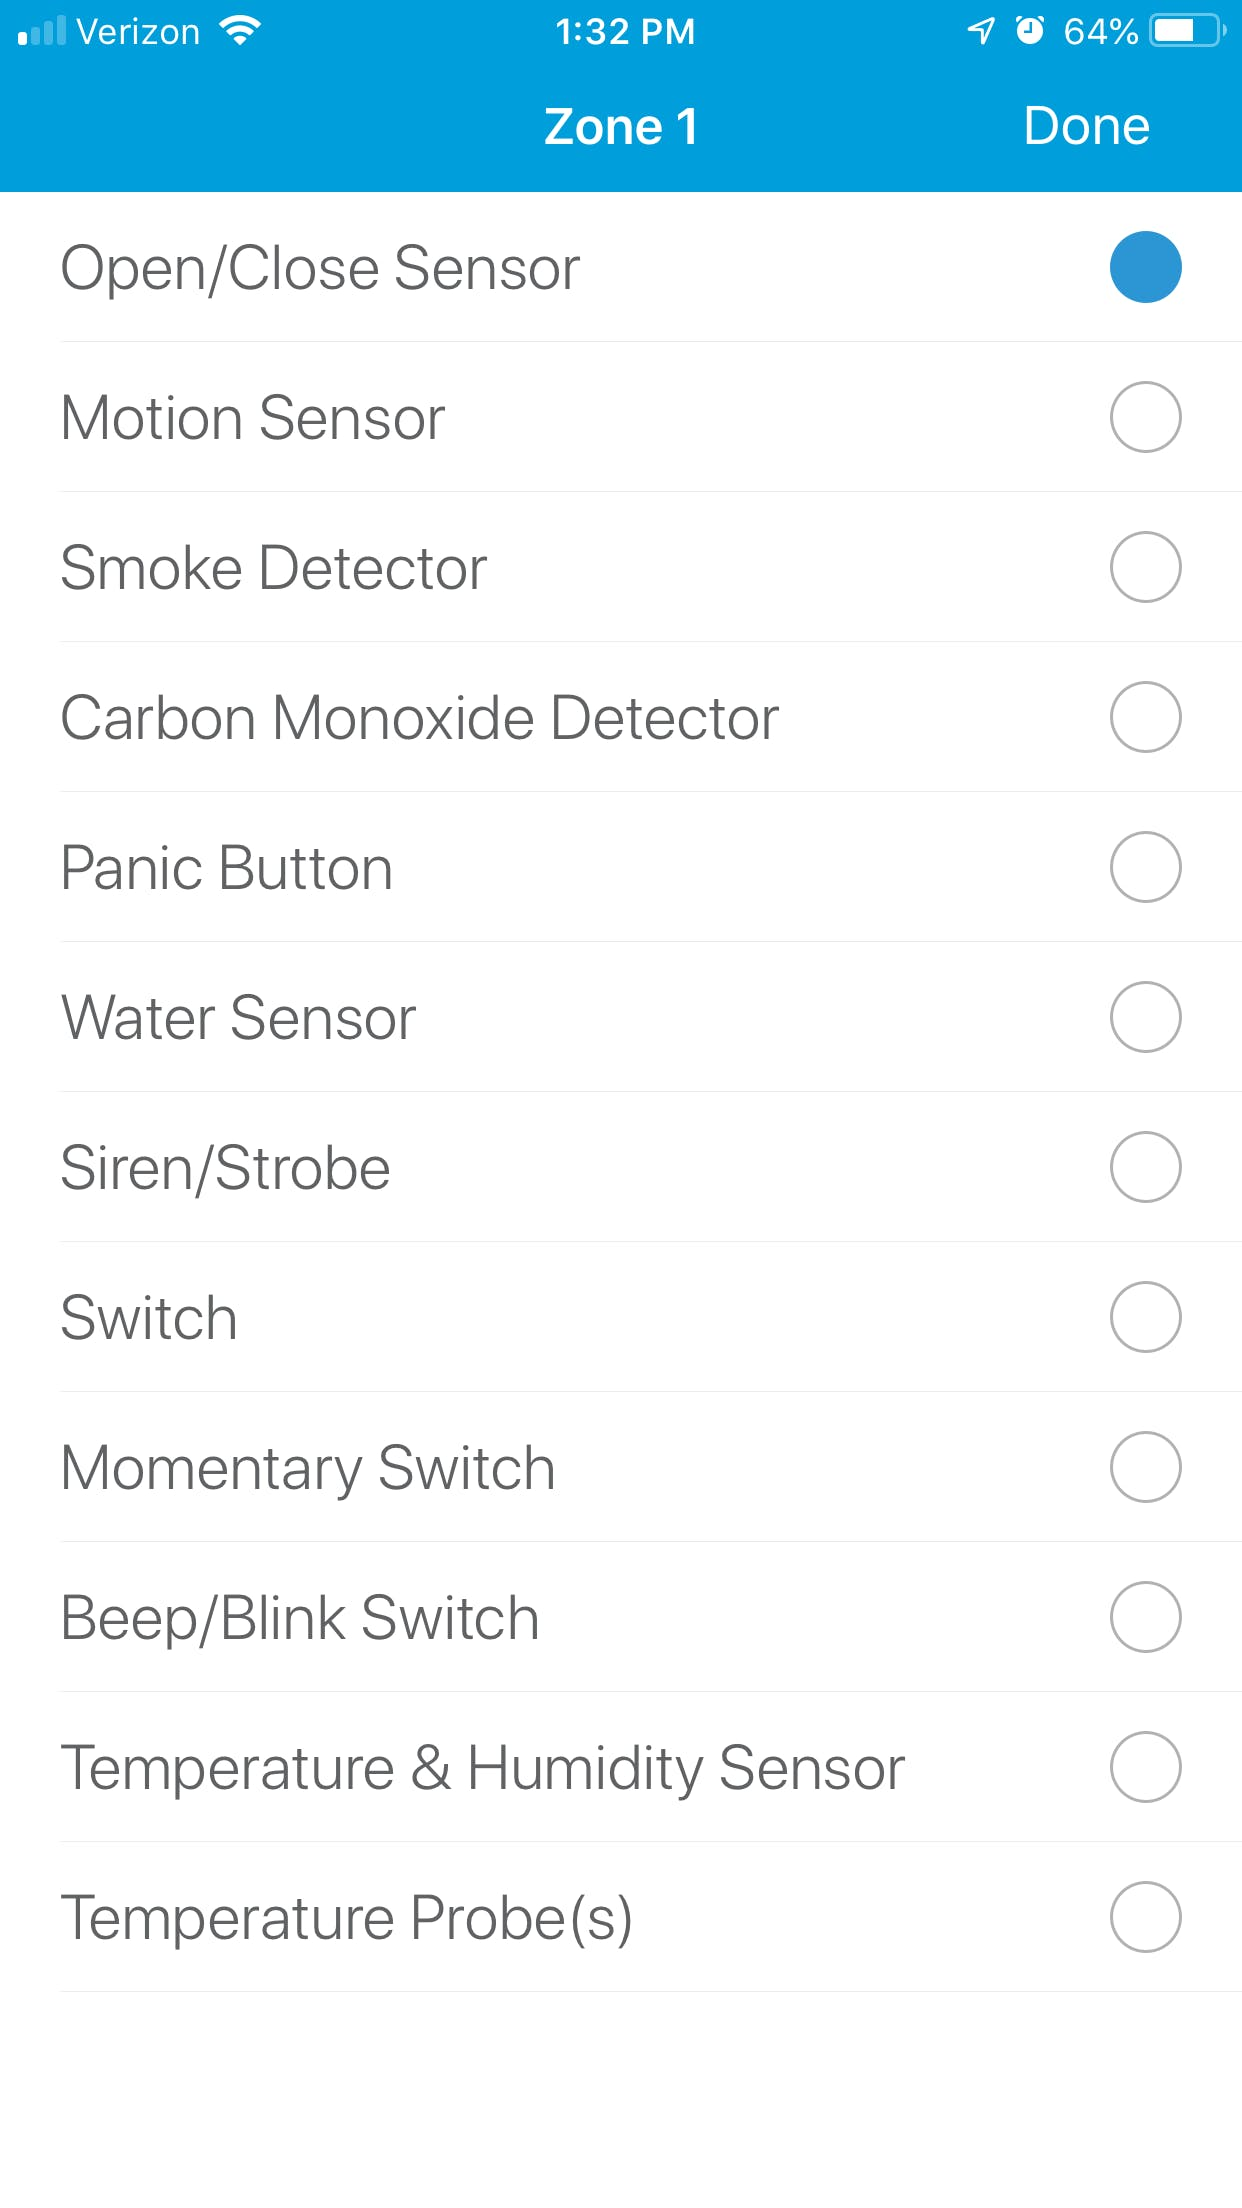
After identifying the contact sensor, we were able to easily identify the motion sensor. Even when set as a contact sensor, the motion sensor was showing movement multiple times per minute. As we weren’t opening any door that often, it was easy to eliminate the possibility of this particular sensor actually being a contact sensor. To update it from contact to motion sensor, we simply visited the SmartThings Classic app, clicked automation, SmartApps, Konnected, and then clicked on the device name before clicking Next. From this screen you can configure all of your wired zones by naming them and by identifying them as:
- Open/Close Sensor
- Motion Sensor
- Smoke Detector
- Carbon Monoxide Detector
- Panic Button
- Water Sensor
- Siren/Strobe
- Switch
- Momentary Switch
- Beep/Blink Switch
- Temperature & Humidity Sensor
- Temperature Probe(s)
This left us with two unidentified zones. The fifth—we're assuming—is another safety sensor. Perhaps a glass break sensor? We're not sure. We reached out to Konnected for feedback, and they suggested that we buy a wire toner/tracer or a multimeter to speed up the process of identifying the remaining sensors. While this is good advice, we didn’t take it as the final sensor, the siren, was also easy to identify.
Identifying the siren was easy as the wiring was different from the other options. The problem here was that it didn’t work. When we triggered the wired siren from the SmartThings app, it made a little “pfff” sound, but nothing more. According to our Konnected contact,
“For the siren, sometimes in older systems, the siren is just a speaker and requires a siren driver to make it sound. In that case, unfortunately, we recommend replacing it with one that has a built-in siren driver, like this great deal for $8.”4
However, with two contact sensors and one motion sensor working, we felt like we had enough to get our hands dirty with Konnected.
Creating Rules using the SmartThings App
Rules
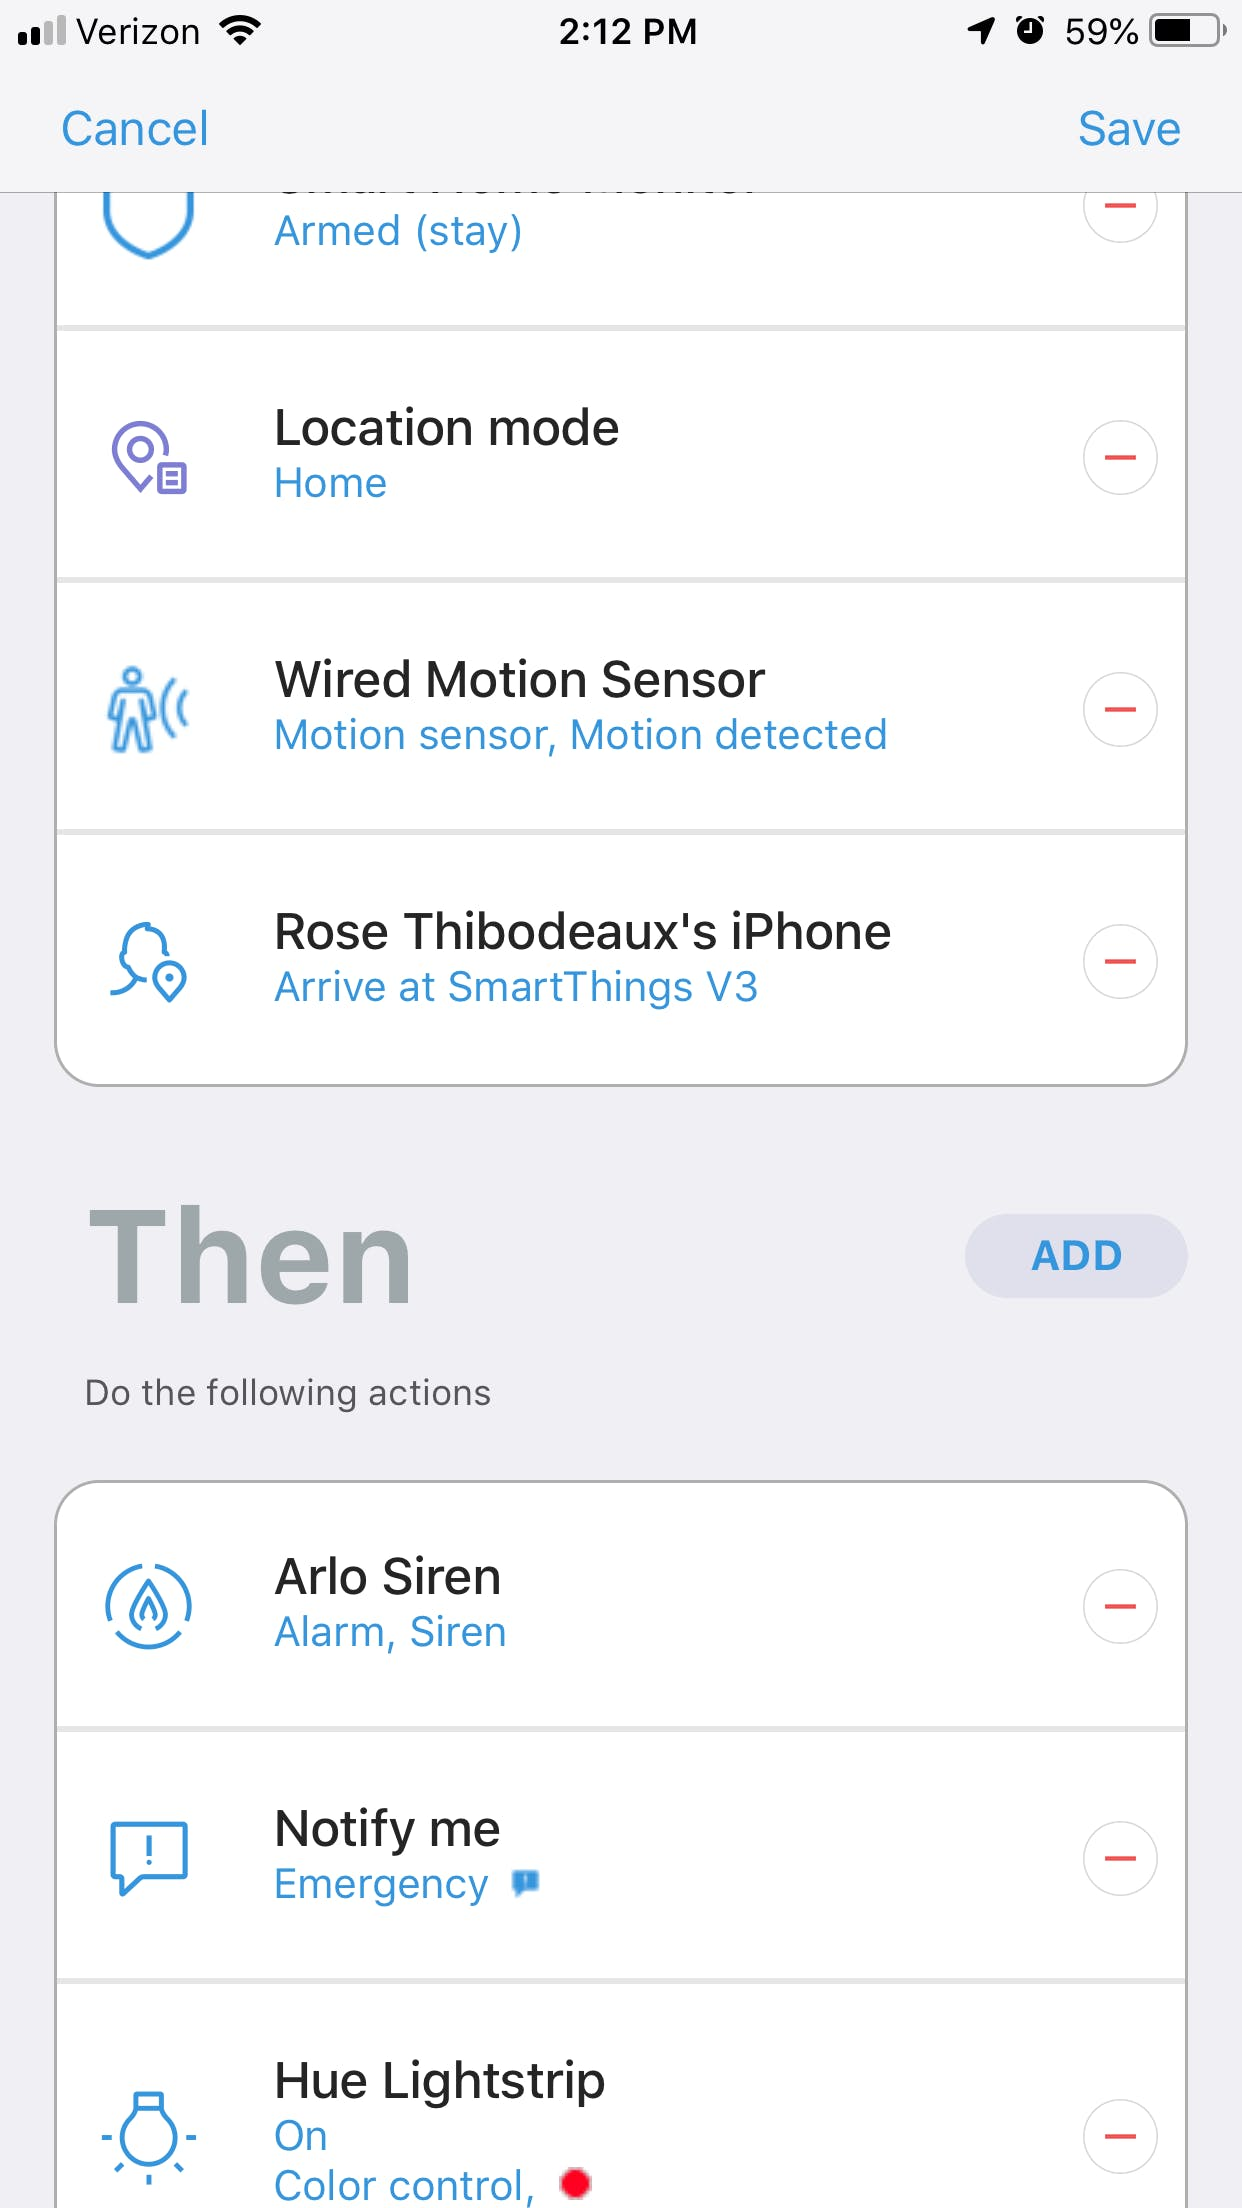
Though the Classic app is required for installation, you can use either Classic or Connect to create rules. We know a lot of people prefer Classic, but we prefer Connect because we like the IFTTT-like engine that allows you to create rules in an ‘If This Then That’ format with multiple If and Then conditions.
For example, we can say, “If wired front door is opened, motion is detected, and it’s between 7 pm and 11:59 pm then turn on the lights.”
If you wanted a more security-focused rule, you could say, “If security mode is armed “stay, I’m home (based on your phone’s presence), and wired motion sensor detects motion then sound my Arlo alarm, turn lights red, and send me a text.”
Creating rules using your wired sensors is no different than using wireless sensors. You will have access to the same condition including: based on the time of day, based on device status, based on member’s location, or based on security mode. Your action (Then) can be “notify me,” “control a device”, or “change this location’s mode.”
SmartThings Monitor
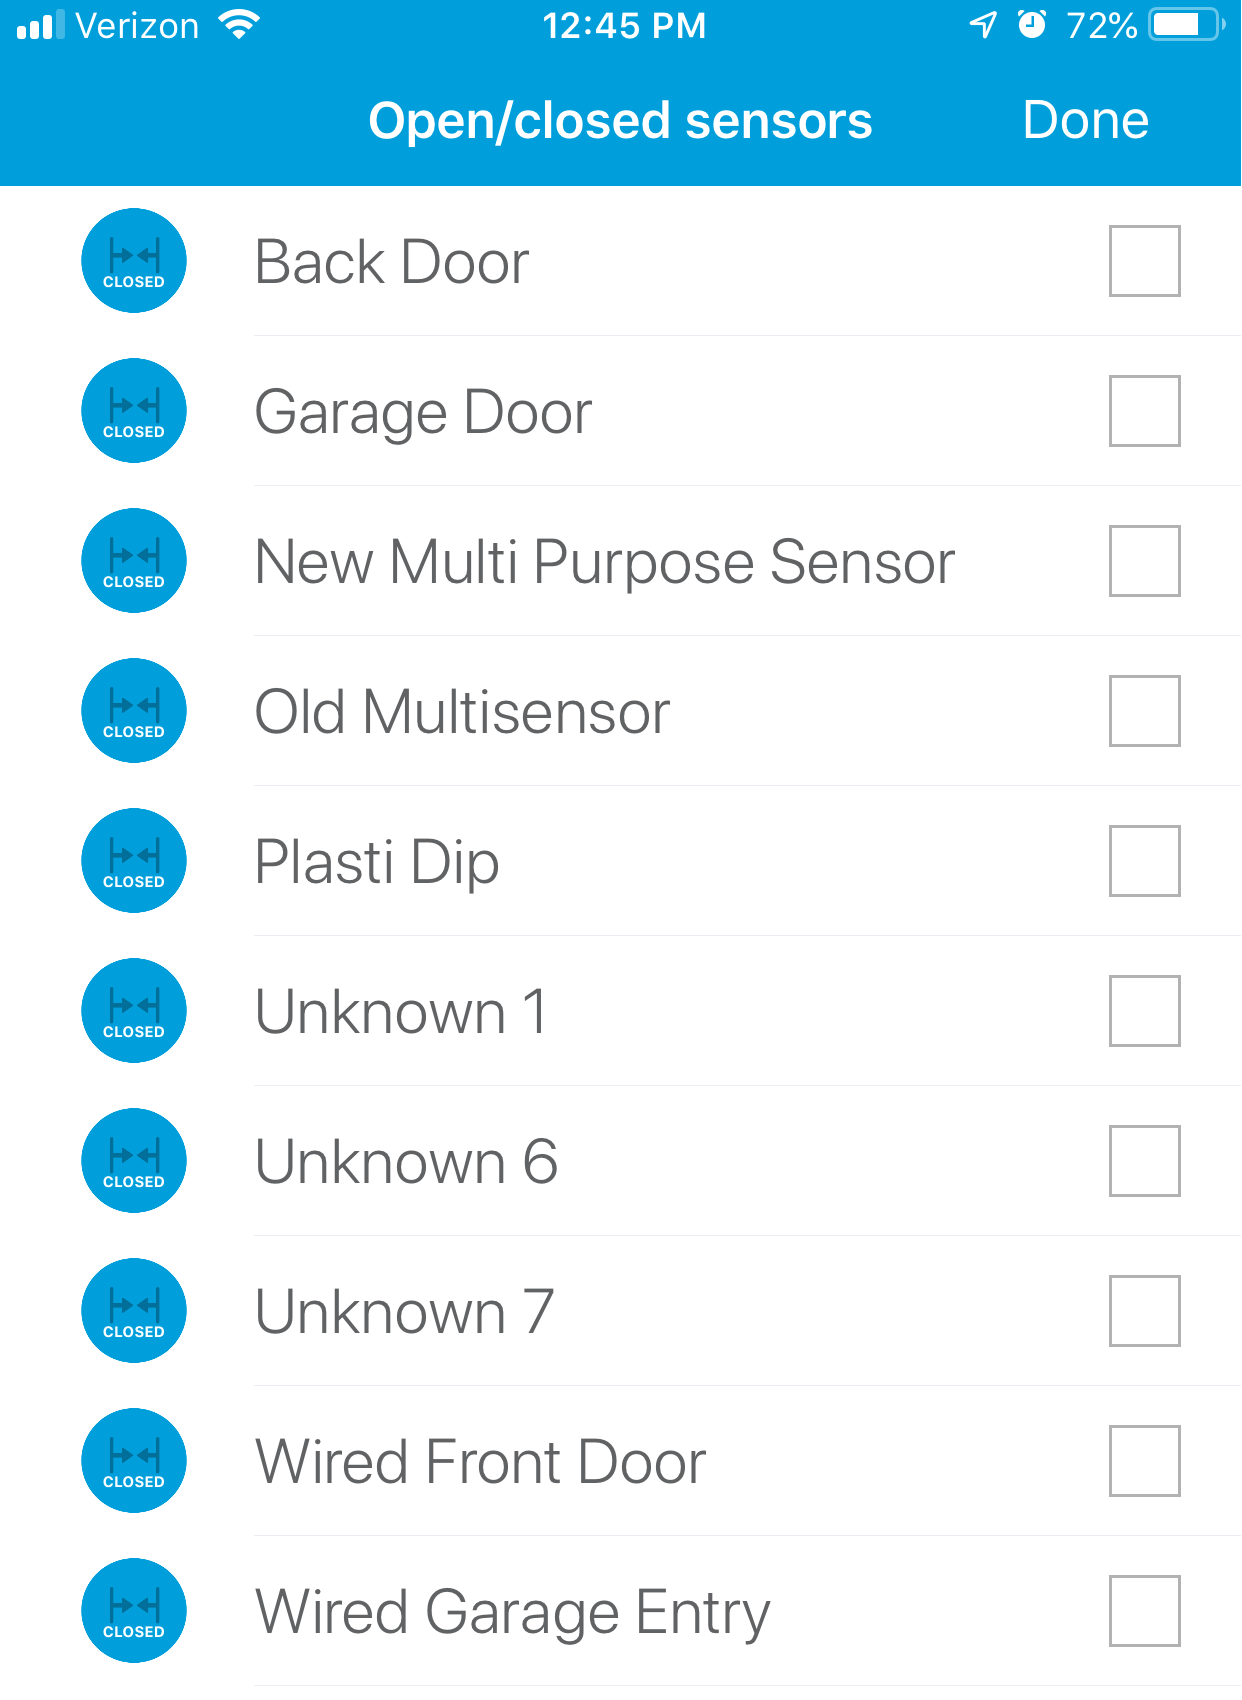
In addition to creating rules, your wired sensors will fit right into your Smart Home Monitor setup.
If you have Smart Home Monitor set up to use every sensor, your Konnected sensors will automatically be included, but if you’ve manually gone in and configured only certain sensors to connect to Smart Home Monitor, you will need to visit the Smart Home Monitor setup page and add your wired Konnected sensors as needed.
Konnected and Noonlight
As far as third-party integrations, Konnected will work with anything your hub works with. For SmartThings users this means IFTTT, Stringify, and even announcements through Amazon Alexa.
Konnected also advertises an integration with Noonlight.The power of Noonlight enhances Konnected’s ability to protect your home. We will take the rule we created and shared above as an example. Let’s say you receive the notification, your lights are flashing red, your Arlo alarm is sounding, and you're half asleep. This scenario is one reason why we maintain a monitored alarm over a self-monitored alarm, and it’s one addressed by the Noonlight/Konnected integration.
With a Noonlight subscription, Konnected can send information to Noonlight. For example, they can send the status of your smoke detector or your door sensors. When this happens, a notification will be sent to Noonlight’s UL certified, U.S.-based monitoring center which is open 24 hours a day and 7 days per week. Noonlight will first try to reach out to you. If there’s no response, they will reach out to your local first responders.
Noonlight’s service is contract-free and is paid on a monthly basis ($9.99/month.)
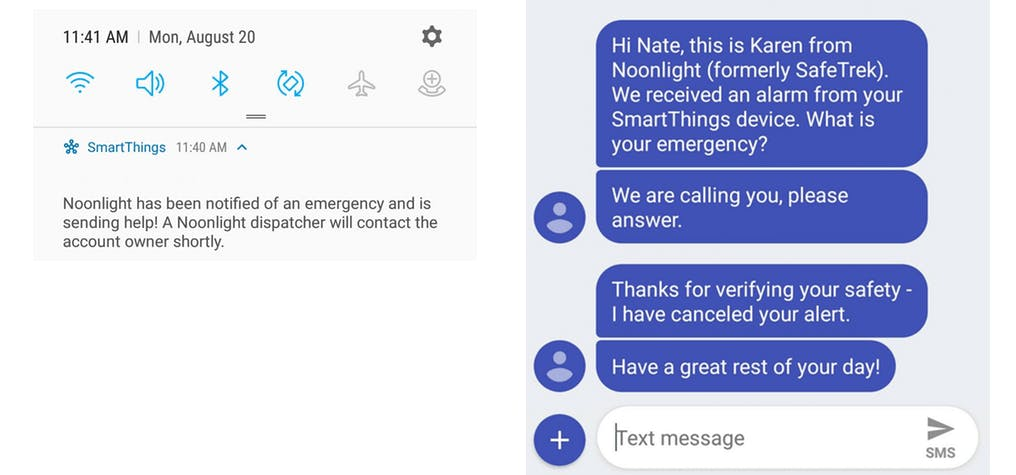
Beyond protecting your home from burglaries and fires, Noonlight also offers protection on-the-go. It works as a panic button app that you can take with you. We use it in parking garages and anytime one of us is walking alone and feeling uncomfortable. To use it, you simply open the app, keep your finger on the virtual button that’s present on the home screen, and release your hold on the button to call for help. Noonlight will again reach out to you. If they can’t reach you, they will send first responders to your location, no matter where you are.
Konnected Alarm Panel Interface
Finally, if you want to keep your existing motherboard and security service in place while also tieing into automation, Konnected sells a panel called INTERFACE. According to Konnected,
“The new board has special circuitry that lets it tap into any brand of wired alarm system sensor loop without interfering with the existing system.”
This means that you can continue to use your wired sensors even if they are attached to a paid monitoring service.
Think of it like this: The Konnected panel we tested is for replacing wired alarm systems. It turns them into self-monitored alarms. INTERFACE works alongside wired alarm systems. You can still use your current app and monitoring service, but you will also be able to use your wired sensors for smart home automation.
Final Thoughts
Konnected is a must buy for anyone who wants to convert their old wired alarm system. The process isn’t perfect, but in our experience, that had less to do with Konnected’s technology and more to do with the fact that we don’t know anything about our current wired alarm system and some of the sensors may have been installed improperly. If you happen to have information on your current alarm and its zones, and you know that your sensors work, your experience will be even better.
You can learn more about Konnected by visiting Konnected.io.

